Showing posts with label DIY. Show all posts

3.23.2015

DIY easter crayons

We are big fans of holidays around here and I am always keeping my eyes peeled for festive crafts and new traditions to start with Olivia, especially now that she is almost two and able to participate alongside me. We made peep houses a few weeks ago and had so much fun. Because I didn't quite trust her with frosting or sugar covered peeps, I gave her the role of graham-cracker-eating assistant while I did most of the work.


We also made bunny rainbow crayons and those have been a huge hit! I made a few batches and packaged them up in cellophane bags with bright easter grass and sent them out to a bunch of Olivia's friends all around the country. 


They are super simple to make and very inexpensive. If you have crayons around the house, you don't even need to buy new ones, but I didn't have any so I picked up a few different packs and got to work! Keep in mind that extremely old crayons aren't going to make the best new ones, so if they are more than a year old, I would invest in a few new boxes.


E A S T E R  B U N N Y  C R A Y O N S

what you'll need ||
+ crayons in assorted colors, with paper removed
+ wilton bunny mold / the one we used can be purchased online here or in your local craft store
+ oven, preheated to 300 degrees

what you'll do || 
+ after peeling the wrappers off all the crayons, break them into 2-3 pieces each
+ fill the mold to the top with a variety of crayon pieces in color patterns you like, breaking them smaller if necessary
+ bake in a 300 degree oven for 10 minutes -- the crayons will have completely melted and will still be liquid, so I removed them from the oven by carefully sliding them onto a flat baking sheet before setting the mold on the counter
+ let them cool completely before removing from the molds -- at least an hour
+ once cooled, carefully pop them out of each mold and start coloring!


If you make these crayons this Easter, I'd love to see them! Tag me on instagram @blessednestblog / They make great gifts and last-minute Easter basket stuffers; I put together a pack of them and a new coloring book for Via as part of her basket. For other Easter basket ideas, you can find my recent post here. Happy crafting!

10.09.2021

our neutral fall mantel

I'm so excited to be sharing our neutral Fall mantel today on the blog. I absolutely love decorating as the seasons change but prefer to keep decor rather neutral so that (1) it always looks good with the natural wood tones in our home and (2) it can be put out earlier and kept out longer even as holidays come and go. Silvers, grays, browns and whites are the prominent colors atop a rich dark brown wood hutch this season in our home.

We have a large antique 'hutch' (I've always called it that but when I use that word hutch nobody knows what I'm talking about) in our living room under our mounted flat screen. The hutch was the first piece of furniture that Dustin bought after buying this home years ago before we were even married. I think of it as his 'bachelor' piece but secretly believe he bought it knowing I would love it and one day get to decorate it after we wed. Side note: He was right, because it's my favorite piece in our home and I intend to take it with me no matter where we move. That, and all our light fixtures.


The hutch and its mantel have become the focal point of our living room and one of the main places I display special photographs. It is also a great place for breakable items since its one of the few places Olivia can't reach (yet). The majority of the photos I frame tend to be black and white because well, those are my favorite colors, but I also love B&W photos because they transition well into every season.


Height is something else to consider when arranging a Fall mantel -- I like placing tall pieces on each end and varying the height of all the items throughout by using vintage vases, various sized picture frames, and flowers or gold branches. Having one focal piece in the center -- such as a 5x7 photo in a glass frame -- draws the eye in without being overwhelming in size.


Many stores sell glass pumpkins and gourds in neutral colors (as well as some brighter oranges and greens) as well as small Fall figurines, such as pumpkins, pears or apples. Target had a lot of great neutral Fall decor this year and I found our silver iron pumpkin a few weeks ago at HomeGoods and fell in love. I knew it would be the perfect centerpiece for Thanksgiving and then decided I would probably be able to keep it out until December 1! I can make my own rules now that I'm a mom, right?


Another great way to add Fall flair to your mantel is by buying small white pumpkins. I found mine for only .69 cents each at Trader Joe's, and also chose them in varying sizes. They look great lined up in front of photos or alongside your other Fall decor. They will also work perfectly for our Thanksgiving table in November.


Finally, no Fall mantel in our home is complete without some type of candy. Our favorite homemade dark chocolate sea salt caramels and almond toffee tends to win out, and I dress it up by placing it in a glass candy jar leftover from our wedding day. I love working candy or food into displays because not only does it add to the overall look but it serves a delicious purpose. You can find inexpensive clear jars of all sorts at places like Home Goods or Marshalls or even use mason jars and fill them with festive candy or potpourri. As we move into winter in a few months, I plan to fill jars with cinnamon sticks and vases with pinecones and swap some of my pumpkins out for those.


I'd love to hear about & see your Fall mantels || Share your photos on instagram and tag @blessednestblog!

9.11.2021

DIY || rustic picture display

I have been anticipating sharing this DIY for some time now & am so excited that today is the day! For months I had been wanting a way to display black and white photos without having to frame every single one and bit a million nails in the wall. After searching and searching for the right display both in stores and online, I came up completely empty so my handy husband and I decided to design our own. 

While there are a few steps involved, this is certainly a DIY project you can complete in a weekend. It is inexpensive and the finished result is well worth the work. Ours is hanging over our oversized sectional in our basement and it brings the whole room together. Plus I've always felt a big part of making your house a home is hanging special photos. It's amazing how much cozier our basement is now that this is part of it. On our display, I show the progression from our engagement photos through current day of Olivia. It is such a joy to see how far we've come in just a few short years! 

I also love that I'll be able to easily change out which photos I display as the seasons change and we have new photos printed. You could even hang special cards, love notes, or anything you wanted in place of the photos. The vibe is rustic & its not only functional but seriously gorgeous.


what you'll need
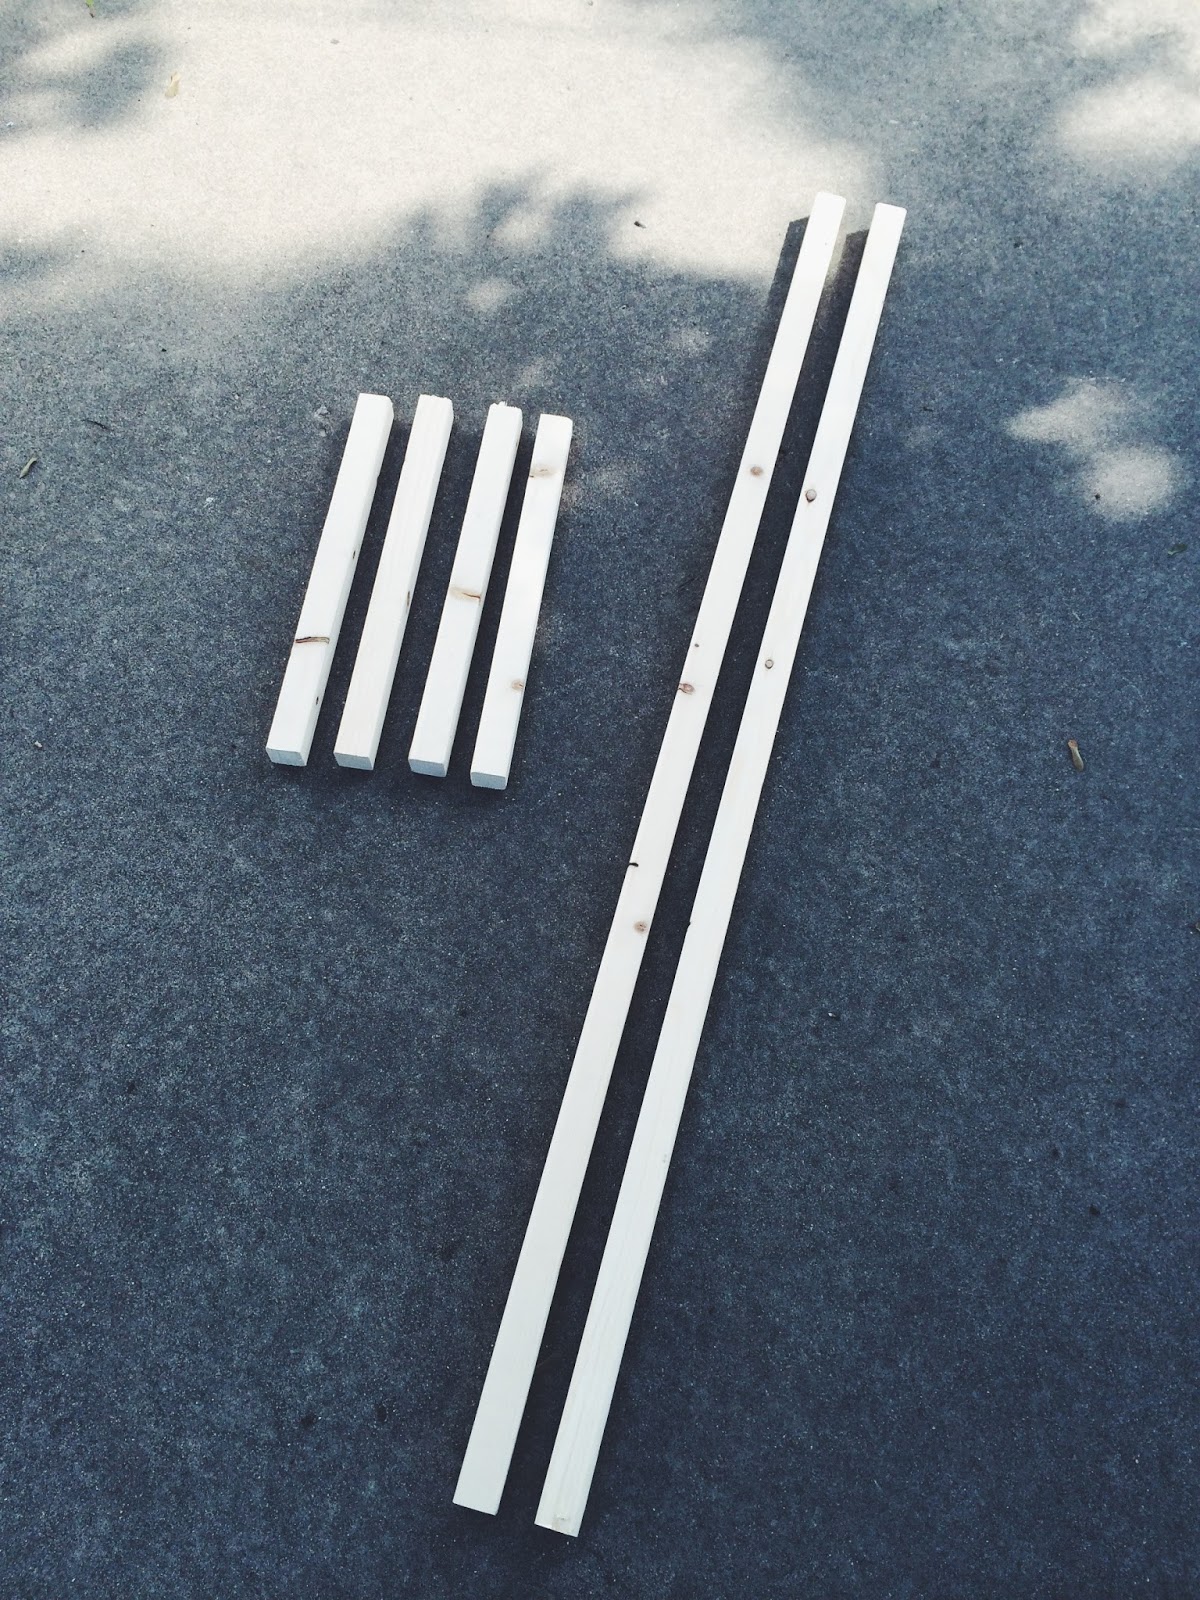
(3) 1x6 pieces of wood, each 5 feet in length // We bought longer pieces and cut them because Home Depot didn't sell the exact length we needed
(1) small can of stain // We used Varathane 'Dark Walnut'
(1) rag for staining
(6) eye screws // approximately 1/2 inch in length [keep in mind the wood is only 1 inch thick] // also called screw eyes, eye bolts, etc. 
(1) roll of 18 gauge wire, a minimum of 3 yards in length
(2) packets of mini clothespins, a minimum of 24 to allow for 8 photos per board
(6) picture hangers to attach to the back of the boards // These often come with very tiny nails but we found the nails to be useless, so we purchased equally small screws and used them...
(12) tiny screws or nails (see above), 2 needed per picture hanger
(6) screws to hang boards on wall // We used drywall screws that were 1 1/4 inches

drill / wire cutter / crescent wrench / level / tape measure / pencil 


what you'll do
(1) start by cutting each of your boards to be 5 feet in length (if needed)

(2) in a well-ventilated area, stain each of your boards using wood stain and a rag; set aside to dry

(3) stain your clothespins if desired and set aside to dry // initially, I didn't plan to stain them but the richness of the wood looked odd against the unstained clothespins so I spent 15 minutes staining them and was really glad I did

(4) once your boards have dried, lay flat to attach the picture hangers onto one side for hanging // using a hammer + nails or a drill + screws, attach two picture hangers per board, approximately 12 inches in on each side (3 feet apart)

(5) next, flip your boards over to attach your eye screws
          » using a drill, pre-drill a hole for each eye screw that is smaller than the screw itself
          » we positioned our eye screws 2 inches in on each side
          » your drill bit for creating the holes must be smaller than the screw diameter itself, so for example our eye screws were 1/4 inch in diameter so we used an 1/8 inch drill bit for pre-drilling

(6) once your holes are pre-drilled (2 per board, 2 inches in on each side), screw in each eye screw by hand as tightly as possible; when you can no longer tighten it by hand, use a crescent wrench to finish tightening and be sure on your last turn they are oriented up and down

(7) next, string your wire:
          » unwind 4-6 inches of wire and wrap it tightly around one eye screw
          » taking your time, wrap it 4-5 full turns around the screw
          » without cutting, stretch your wire to the other end of the board and give yourself 4-6 inches of extra wire then cut
          » repeat this step with the second eye screw -- wrap the wire tightly around the screw 4-5 full turns and trim if necessary
          » repeat above steps on the second and third board
          » the most important thing is that your wire is very tight -- you do not want it to droop once you hang photos on it, and even though photos are very light, the weight of them will bring the wire down; to ensure your wire is as tight as possible, use your crescent wrench to tighten one eye screw on each board until the wire is taut (about 1-3 full turns)

(8) next, using 6 screws and a drill, hang them up in your desired location -- keep in mind they are 5 feet long and should be spaced adequately so your pictures do not overlap the boards; your attached picture hangers are approximately 3 feet apart and that helps to gauge where to drill in your screws
          » we used a tape measure and pencil to mark our holes before drilling and then used a level to ensure their position

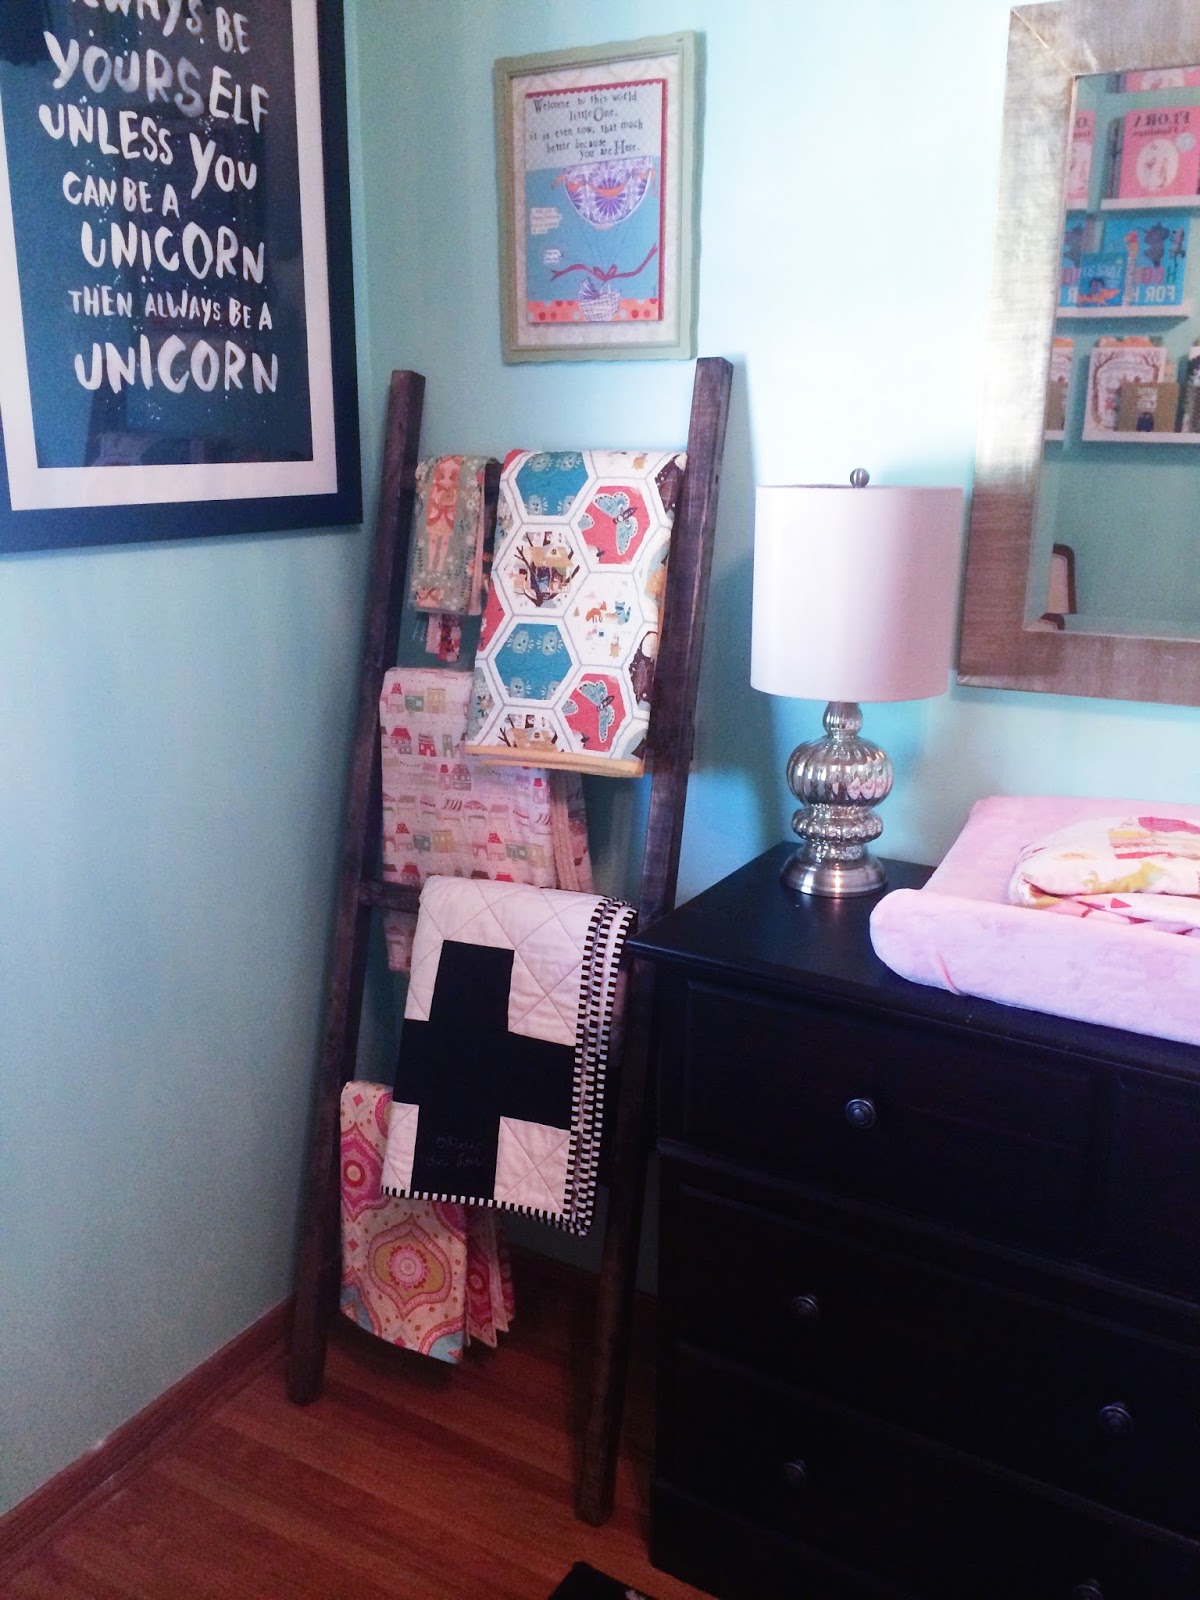
(9) finally, once boards are hung in place, attach your photos to the wire using mini clothespins and arrange as desired; our photos are 4x6s and I've found that 6-8 per board looks great


It sounds like a bit of a lengthy process, but it goes super quick! If you want to complete this in a weekend, I would suggest getting everything & staining your boards + clothespins on a Saturday and then attaching all the hardware and hanging on a Sunday! If you like this DIY & do it in your home, I'd love to hear from you! We are so pleased with how it turned out and had a lot of fun designing it start to finish! Happy almost-weekend!

8.04.2021

DIY | gold branches

Because almost everything is better in gold, and because autumn is right around the corner, I had to share my favorite recent DIY project that is so simple but produces a gorgeous end result: DIY Gold Branches.


I was inspired to create these branches after getting my first pumpkin-apple candle of the season last weekend. Our home seriously felt [and smelled!] so cozy and perfect but it just needed a touch of glam to amp up the Fall vibes. The color gold -- and all warm tones -- are of course associated with the changing of leaves and the approaching season, and branches make the perfect canvas because they can be found in your backyard, literally.

I was blown away at how easy this project was and had so much fun doing it! I am already planning on putting a spin on painted branches for the winter...though I'm certainly not in any rush for those. These gold branches would make the perfect addition to any room; they would be lovely in a little girl's nursery or a modern bathroom & of course they would make a festive centerpiece for your dining room table around the holidays. Seriously, these changed my world. 


what you'll need

5-8 branches || find these in your yard & around your neighborhood; look for unique patterns and branches of varying heights to create an aesthetically pleasing arrangement; if you aren't able to find any, most craft stores offer some form of branches whether individually or sold as one bunch

gold spray paint || I purchased a $7 can from a local craft store but it can be found at hardware stores as well; be sure to buy a metallic variety so that it will give a nice shine [versus a "flat" paint which will offer gold color but no sheen]

newspaper || use sheets of old newspaper to protect the surface on which you are painting the branches

tall vase or mason jar to arrange and hold the branches || I eventually plan to paint our glass vase but haven't quite decided on a color


what you'll do 

in a well ventilated area [I did this in our backyard], lay a single branch on your newspaper and using your gold spray paint, coat branch evenly, covering completely; let sit to dry for 2-3 minutes and flip over to coat the other side; set aside to dry

continue to repeat with all the branches

allow gold branches to dry for 20-30 minutes before arranging; remember that you can break off pieces of the branch if it is throwing your eye off; play around until you've arranged them to your taste // I started with my largest & most elegant branch in the center, then arranged around it, modifying it a few times until I was happy with how it looked. The beauty of it is that these are meant to look rustic, so the more unique the branches are -- the better! Happy Monday!

7.22.2014

the fintorp | simple & inexpensive way to transform any wall in your home

I am always on the lookout for simple ways to transform walls in our house, especially the small walls that don't serve much of a purpose but that you see every day. [Okay, other than the purpose of holding the house up]. You know, the white ones that have nothing on them? The walls that you look at and wish something was there but you just can't come up with the right thing? Well, we were there once. In fact, we were there just two weeks ago. Dustin and I stood in the kitchen and stared at the dividing wall between our kitchen & dining room: White. Empty. Boring. Inadequate size to do anything too fancy, but still large enough that something had to be done. 

Cue, the Fintorp.


If you haven't heard of it, the Fintorp system is a rail-based organizer which includes hooks, wire baskets and metal buckets. You can arrange them in any way you want -- keep it super simple or get pretty fancy. They can be connected for long rails to run across entire rooms, or kept single for shorter rails in a stack the way we have in our kitchen.

The Fintorp is available from IKEA both in store and online and is fairly inexpensive. There are several ways to customize it and the Fintorp can really function in any room of your home. We have ours in the kitchen, but I think one in a nursery over a changing pad would be great to fill with diapers, wipes & the other supplies you use every day if you don't have dresser space. One would be equally as darling in a playroom at a reachable height for young children, and could be filled with favorite toys or art supplies. It would also serve well in a bathroom or laundry room, using hooks to hang towels and washcloths. 

The list goes on and on, but the point is: if you don't have a Fintorp in your home yet, you should. In just half an hour, we transformed our empty kitchen wall to be one of my favorite spots in the house! 


With a sleek, modern look, the Fintorp was the perfect answer to our empty wall. 


Side note: I have been searching for years for the perfect mug rack...garage sales, antique stores, just about everywhere I could think of. Time after time, nothing. I really just wanted one so I could have the excuse to collect colorful, eclectic mismatched mugs and display them somewhere in our kitchen. I love the idea of mismatching mugs because you can choose a different one every day. Matching mugs are highly overrated, but for now that's all we've got. 

Of course, if you know us, you are probably laughing because you will know we aren't coffee drinkers. We don't even own a coffee maker! In fact, if I'm being completely honest...I don't even know how to operate a coffee maker! But on occasion I am a tea drinker, and regardless, I use mugs for ice water, iced tea, icecream, you know...that type of thing. Icy things. 

Below are the details of our Fintorp but you can certainly make it your own depending on the room you are using it in and the size of your wall as well as the intended purpose. 


what you'll need || 

» Fintorp Rails | These come in two colors: black or nickel plated [above] & two lengths: 22.5 inches [$8.99] & 31 inches [$9.99], but they can easily be connected if you want to run a rail across a long wall. We chose 31 inches simply because of the size of our wall, but if you need larger just connect two of the 22.5 inch rails using a single bracket. 

» Matching Hooks | You purchase these separately from the rails themselves, and they are sold in packs of 5 for $2.99. If you want longer + larger hooks than the standard size, they are available in packs of 2 for the same price here.

» Optional Accessories | If you want to add wire baskets or a small galvanized bucket, you can certainly do that. We opted to keep it simple with nothing but hooks just because I intend to hang mugs and my favorite dish towels on it.

» Drill + Screws or a Hammer + Nails | For hanging it up!


what you do ||
» Once you have all the necessary pieces for your setup, unwrap everything and start first by deciding how far apart you want the rails to be. We chose to have ours 10 inches apart to accommodate various sized mugs, but you could put them closer together. If you are just hanging one rail, you don't need to determine spacing but should consider the height itself. 

» Next, determine how far in you want the bracket. We placed ours 1 inch from the end of the rail, but you can customize it to your preference. Two brackets are included with each rail, and they are each two parts -- the front part you see and a thin flat "back bracket" piece that you will ultimately use to secure to the wall. Tiny screws are provided for attaching the two bracket pieces together but by using the back piece before attaching them, you can get an exact idea of where to put your screws or nails.

» Using the back bracket piece [before attaching], hold it up in place where you want your rails hung [one inch in if you are following our layout] and mark in the center with a pencil. Do this on both sides and then put screws in wall. Attach the two bracket pieces together using provided screws. This is very self-explanatory but we didn't know it would be helpful to wait to attach the pieces, so I sat and attached them all and then Dustin had me take them apart to use as screw guides. 

» Next, slip the brackets onto the wall, slide in your rail, add your hooks & put the end caps on. Secure your rail using the provided allen [hex] wrench. 

» Finally, hang your mugs, towels, accessories and more on the hooks! Rearrange as desired and step back to enjoy the transformation! I still catch myself admiring our "new" wall and love how it turned out and how easy it was! For the setup we have with three rails and 15 hooks, it cost approximately $40, which is significantly less than a fancy shelving unit, and way, way better!!

I think it would be so much fun to have a Fintorp hanging in a kitchen, dining room or living room with galvanized buckets filled with succulents, herbs, or any small plant, or to hang one in a mudroom for jackets and bags to grab on your way out the door. No matter how you use it, it adds function and style to your home and offers the opportunity to get both organized & creative!

I'd love to see how you transform a wall in your home with the Fintorp system or to hear any other ideas you have below! We are so happy with ours and I am already planning on where we'll rig our next one!

7.16.2014

DIY || rustic blanket ladder

Dustin & I made it a goal to complete two DIYs per month for the rest of the year. In May we finished a large basement bathroom renovation, we are just about done with our laundry room reno and then in August we I hope to renovate our master bath. But between the big time-consuming projects, there are so many simple ways to dress up your space and make your house a home. Whether by hanging new artwork, updating light fixtures, rearranging furniture, painting, organizing, or creating something that you've needed but never found...its amazing how such simple projects can make such a difference!

I've been wanting a blanket ladder for Olivia's nursery for quite awhile now. Between all her special blankets and her beautiful birthday quilt, I wanted a way to display them on a daily basis when she wasn't using them. This especially is true in the summer, because its way too hot for blankets in our neck of the woods until about mid-September.

This is such a simple project that costs only pennies to make. It is a great DIY for beginners because there are only a few steps and it really is impossible not to succeed. Plus, many stores sell blanket ladders for well over $100 and you can make yours -- even customize it to your preferences [height, width, stain, etc.] for next to nothing! The best part? It can easily be completed in an afternoon, and those projects are my favorite. 
When I get an idea in my head, I don't want to wait! 


what you'll need || 

(2) 8 foot 2x2s || 16 feet of wood total
(1) 8 oz can of stain of choice || We used ASH by Varathane because it created a more rustic vintage look
(1) Rag for staining || We used an old t-shirt
(8) 3 inch screws
Drill

what you do ||

1. Cut one 5 foot piece of wood from each of your 8 foot pieces || You will end up with four pieces -- (2) 5 foot pieces & (2) 3 foot pieces

2. Next cut each 3 foot piece in half to be 18 inches || Be sure to be exact when measuring and cutting

(4) pieces, 18 inches each + (2) pieces, 5 feet each

3. Lay them out on the ground to form a ladder || I arranged them with the prettiest wood characteristics [knots + chips] to show & we put each rung 12 inches apart but started 18 inches from the ground to allow for a blanket to hang on the bottom bar [Make pencil marks for screw locations at measurements]


4. Using a drill, screw each rung into place.

5. Finish using stain of choice, being sure to completely cover wood

6. Keep in mind that most stain dries within an hour but we allowed ours to dry overnight before hanging blankets from it.


This simple blanket ladder costs less than $10 to make and adds both character and function to any room of the house. We have ours in Olivia's nursery holding her special quilts & blankets but plan to make another for our basement soon!

Back to Top